Friday, January 1, 2010

Christmas Dreamer


You will need these things for this tutorial:
Paint Shop Pro. Any version should
work for this.
Scrap Kit of choice. I am using a kit by
Tracy at Scrap Anonymous when
it was a freebie at a store
She belongs to.
Tube or image of choice.
I am using an overlay for My paper by


I have a note here as My kit isn't a scrapper's
size so I'm going to have to open
a blank canvas 3600x3600.
Some of You might prefer full or tagger's but
Mine when I do tags and things I love
them to be full size. Anytime You get a full sized
kit the elements You use are easily sized.
This is how You do it.
Image
Resize
All layers unchecked
And for size use
Percentage until it's a size
You like.

Ok so if Your using a tagger sized kit open a blank canvas
of 700x700, if it's full go 3600x3600.
Find a paper from Your kit.
Edit Copy.
Click on the blank canvas with Your magic wand.
Edit
Paste as a new layer.
Selections
Select none.

Open a frame from the kit and paste
it as a new layer.
Add any of the elements You wish
to the tag/Quick Page
pasting each as a new layer.
Using Your magic wand click inside of
the frame.
Go to Your paper layer and tap the
delete key on Your
keyboard.
Selections
Select none.

Now let's add some depth so go to
Effects
3D Effects
Drop Shadow
Vertical 0
Horizontal 0
Opacity 100
Blur 15.00
Color Black.
This step might vary with whatever
kit You have chosen to use so just
play with the settings.

To add an image to the frame just click inside
of it.
Selections
Modify
Expand by 15.
Layers
new raster layer.
Edit
Paste into selection.
Keep in mind the expand might be too big on Your
creation so just play with the
settings some.
Selections
Select none.
Drag that layer under the frame layer.
Add any text You want and then
merge layers.
You can either save the full sized Quick Page
or size it down for a tag and then
save as png.

I hope You enjoyed this tutorial.


Thursday, December 31, 2009

Wings Of Hope


You need the following supplies for this
tutorial.
Paint Shop Pro.
I have psp 10 but any version should
work for this.
Scrap Kit of choice or Mine.
Mine is by the talented designer Charly of
The kit is called Breast Cancer Charity
Kit.
You can find it at her store here.
Template By Jolanda from Jellebelleke's


Open template in psp.
Image resize
all layers checked
700 pixels. Make sure that
it's not percent.

With Your magic wand click on Raster
1.
Layers
New raster layer.
Find a paper You like from the scrap kit
that You chose to use and
open it in psp.
Edit Copy.

With Your magic wand click on Raster 1.
Layers
New raster layer.
Edit
Paste into selection.
Selections
select none.

Click on Raster 5 and using Your magic
wand use it on the layer.
Layers
New raster layer.
Open another paper of choice that
will blend in well with Your
creation.
Edit Copy
Edit Paste as a new layer.
Selections
Select None.

On Raster 6 repeat the same steps
as above.
Do the same for Raster 7 and then on
the copy You'll have to scroll up
slightly in Your layer palette and do the
same as We just did.
If You have a nicely textured paper then
use another with a lighter shade.

Ok go back down to Raster 4 and using
Your Manual color correction tool
use these settings:
Manual color target
checked.
Freehand Selection
unchecked.
Source: use the eye dropper tool and
use the same color as the
frame.
Target a color that goes well with
the rest of Your QP.

Now delete all the templates original
layers except leave Raster 3
alone. We'll get to that here in just a
little bit.

Now just start to add any of the elements
from Your chosen tag that You
like.
If they are too big to
Image resize
All layers unchecked.
Be sure that percent is now chosen
and just reduce it's size until
it's right. If not just hit undo and keep
trying.

Let's add a little depth to all of Your elements.
Effects
3D Effects
Drop Shadow
and use your own settings as no matter what
I tell You to use it always varies on
things such as this.

Remember that blank black layer? With Your
magic wand click on
it.
Leaving the ants marching hit Your delete
key.
Keep the ants marching.

Click on raster layer 12 and hit Your
delete key once again.
If Your like Me and always put drop
shadows on it's own layer You
will need to delete
those too.

Click on Raster 10 and 12 repeating
these steps.
See how easy this was? You've now learned
a new trick.

Ok now We are going to add some text to
this very pretty page You've
been making.

Click on Your eye dropper tool and depending
on the paper You used
on the background You will either choose a
light or dark color.

Now add any of the text You want and give
it a pretty drop shadow.
If You wish to now add an image of Your own
just click inside the frame and go to
selections
modify
contract
by only a few pixels though and then it should
look very very nice.

I hope You enjoy this tutorial as much as I did
writing it for You.


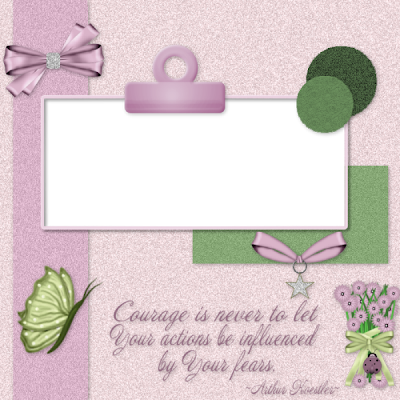
How To Make A Quick Page From Scratch


For this tutorial You will need to use a scrap kit of
choice or Mine. I am using a kit by the
wonderful Charly of Country Hollow Creations and
You can find Her kits at Her store here.

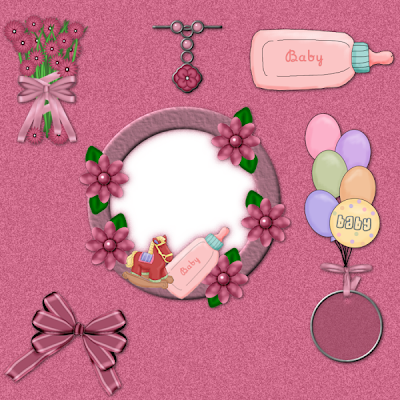
The one I'm using is called Baby Time.

I know that some of You are interested in all those
bigger sized images that many scrappers make
with their kits and such, so I decided to
teach You the basics of it. I hope
some of You find it of
use.

This one is going to be a smaller version of a normal sized
quick page but it's still going to be made just like
a real one.

So to get started open a blank canvas of 900x900.
Using Your magic wand click on the blank
canvas. From the kit choose a paper You really
like and go to edit copy and edit paste
into selection.
Selections
select none.

Now from the kit You have just chosen open a
frame or other like element from it.
Edit copy
Edit paste as a new layer.
Positioning it where You'd like it to be.

If You'd like to make the said element a little
bigger all You need to do is go to Image.
Image resize
All layers unchecked.
Put the size on percent and type in
about 110 or so and just
use what looks best
to You.

Now just begin choosing the elements You'd
like to use and paste them over
the canvas as We did with
the frame.

My quick page won't be half as good as
Your's trust Me lol I am just
trying to guide You in how to pull
off a really nice looking
creation.

Ok now let Us add some depth.
Effects
3D Effects
Drop Shadow
Vertical 2
Horizontal 2
Opacity 60
Blur 10.00
Color Black.
If these settings are too much for the
page just play with the settings.

Now on Your frame layer click inside of it
with Your magic wand.
Now click on the paper layer in your layer
palette and hit Your delete key on
Your keyboard.
Selections
Select
none.

Now that Your done with that You can add
Your own text etc that You wish.
Save as png and it will match any Background
You want to put it onto.
I do hope somebody found this a little
useful.


Wednesday, December 30, 2009

Candy Coated Love


You will need the following supplies for this tutorial:
Scrap kit of choice or Mine.
It's called candy coated and can be found
It's made by the very talented Heather at

Template made By DBA. Thank You Ali
for allowing Us to use Your wonderful templates for
our creations. You will have to look under

Paint Shop Pro but if You know Your programs well
enough You could probably do this with any
of them out there.

Tube of choice. I used a tube by Jason Patterson
which I acquired through MPT's yahoo group.
You have to have a license in order to use any of his
artwork.

Now let's get started. Open Your template in psp and
duplicate it by pressing shift+D and close the
original one.

Click the background layer with Your magic wand and
opening a paper of choice from the kit go to edit copy
and edit paste as a new layer and then selections
select none.

(Side note here. Now depending which psp version
Your using Your manual color correction tool will be
under Your customize settings when You click on psp's
background. So go to the area under Your tag and
right click on customize and under commands You will
see tools click on that and look for the color correction
tool on the right hand side and place it on one of Your
toolbars in psp. Just drag it up there. I am not sure where
it is in versions other than psp 10 sorry).

Open another paper or element from the kit and choose
a color that goes with Your tag and keep this open
behind Your canvas but to the left or right of it so that You
can see it.

On the Group Raster Layer use Your manual color
correction tool and for the colors on source click
the merged layer and that shade of grey will be
showing in the box. On the target choose the color
from the paper or element You have chosen and click
ok when You like how it looks.

Click on the raster layer 2 in Your layer palette with
Your magic wand click on the heart and from
the kit Your using choose and paper from it and
go to edit copy and edit paste as a new layer.

Selections select none. On raster layer 5 use Your
color correction tool and use a color of choice
to color the hearts frame.

Delete layers 4 and 6.

For raster 1 and 2 You can either do the paper
steps once again or the manual color
correction tool. It's up to you.

On raster layer 7 We are going to work this
in a few steps since the hearts are two
different colors.

So go to Your manual color correction tool
once again and for the colors of source
choose black and whatever other
color You have used for Your creation.

Now on that same layer let's use Your
freehand selection tool and draw
around all the other smaller hearts that
You didn't did get colored. Be sure
the lasso tool is set to add (Shift) so You don't
have to hold down Your shift key. Once
this is done color them the same way
as above.

On layers 8 and 9 do the same as We have done
with the hearts only You won't have to use
Your free hand tool.

Now we are going to add our tube. Go to
raster 3 and go to edit copy on your
tube and then edit paste as
as a new layer.

Duplicate this layer and pull one of them
under the frame layer and turn the
visibility off on the top layer. now just carefully
erase around the frame on the
outer edge.

Now go back to Your top layer and erase
it doing the same don't worry this is
such a faultless step it will never
look marred if Your a terrible tuber as
I am lol.

Ok now make sure the top layer is still selected
and begin to add any of the kits elements
that You like.

If Your using My kit You will have really size
down. I did this by going to image resize
make sure that percent is chosen and that all layers
are unchecked. I used the numbers between 5
and 20 for all of My elements.

Now let's add drop shadows to all of the things in
our tag. Effects 3D Effects Drop Shadow
with the following settings
vertical 2
horizontal 2
opacity 40
blur 5.00
color black.

Now don't add a drop shadow onto the top tube
that You used for Your heart instead
drop shadow the one below the frame layer so
that is shows no flaws. If You have any
hangers just erase them to
smooth out the tag.

Now add any text You wish and go to layers
merge visible save as png and Your
all done.

I hope You enjoyed this tutorial.


Tuesday, December 29, 2009

Awards


I got this award from The amazing Jane from JT's
Designs. Thank You so much hon and I love You
designs and things. You have some very nice
talent -hugs-.

I am sending this to the following person: (I would send
it to more but with the holdiays a lot of people are away).
1. Susan known as Hippiedaze and one of the most
talented ladies I know out there.