Friday, January 22, 2010

Corazana Heart


You will need the following supplies:
Scrap Kit of choice or Mine. I used Be
Still Heart by TammyKat.
Thank You Tammy for letting Me write
tutorials with Your kits -hugs and kisses-.
Mask of choice.
Mine came from the wonderful Vix.
Look under goodies and then masks.
She has some awesome things to share with You.
Tube of choice.
I used the artwork of Barbara Jensen.


Open a new blank image 900x900. I know it's big
but You can crop and or resize.
With Your magic wand click on the working canvas.
Open a paper from Your chosen kit.
Edit
Copy.
Edit
Paste into selection.
Selections
Select none.

Layers
Load/Save Mask
Load Mask from disk.
Delete the mask layer from Your layer palette
and on the group layers go to
Layers
Merge group.
Adjust
Add/Remove Noise
Add Noise
Gaussian checked
Noise 60 percent
Monochrome checked.

Open a frame from the kit.
Edit
Copy.
Edit
Paste as a new layer.
With Your magic wand click inside of the
frame.
Selections
Modify
Expand between 5-10 depending on
frame.

Layers
New raster layer.
Open another chosen paper.
Edit
Copy
Edit
Paste into selection.
Selections
select none.
Drag this layer below the frame layer.

Open Your tube and go to
Edit
Copy.
Edit
Paste as a new layer.
Duplicate it.
On the original go to
Adjust
Blur
Gaussian blur 6.00.
Bring the opacity down to about
70 percent.
If You have any overhang on the tube just
use Your eraser tool and erase.

Effects
3D Effects
Drop Shadow
Vertical 2
Horizontal 2
Opacity 60
Blur 10.00.

Add Your name give it this same drop
shadow along with Your
frame.
Leyers
Merge Visible
Save as png and Your all done.


Tuesday, January 19, 2010

Sweet Candy Kisses


Supplies You'll need.
Template by Tamie.
Just scroll down and You will find them
and other great templates.
Scrap Kit of choice or the one I'm using By
She also has an ad on available if You can
not get this kit.
Tube of choice.
Eye Candy 5 Gradient Glow (optional).
Penta VTR2 (optional).
Mask of Choice.
I used Vix Mask 177. You find this under
goodies.

Open the template and tube in psp.
Minimize the tube.
Shift+D on the template and close the
original.
Image
Canvas Size
800x800.
Delete the copyright and white background layer.

Layers
New raster layer.
Layers
Arrange
Send to bottom.

Find a paper from the kit You like.
Edit
Copy.
Use Your magic wand and click on Your
canvas.
Edit
Paste into selection.
Selections
Select none.

Layers
Load/Save Mask
Load from disk.
Find the mask You want to use. Sometimes You
need to invert and sometimes not.
Just use what You prefer.

In Your layer palette delete the mask layer.
Layers
Merge group.
Adjust
Add/Remove noise
Add noise
Uniform checked
Noise 60 percent
Monochrome checked.

Highlight the glitter circle layer.
There are two ways that You can do this next step.
We want to colorize this layer.
I usually use manual color correction but I know some
versions of psp don't have it so if You can't
find it just use colorize.
Adjust
Hue and Saturation
Colorize.

Highlight the pink circle layer and with Your
magic wand click on Your working
canvas.
Find another paper of Your choice.

Edit
Copy.
Edit
Paste as a new layer.
Position it however You like it.
Selections
Invert
Tap the delete key on Your keyboard.
Delete the original circle
layer.

Highlight the half circle in Your layer using
Your magic wand click it in Your
working canvas.
Layers
New raster layer.
Find another paper and open it go to
Edit
Copy
Edit
Paste as a new layer.
Selections
Select none.
Effects
Penta VTR2
Line Distance 26
Line Width 0
Contrast 169
Ghost 0.
Delete the original layer.

Highlight the half circle 2 layer and using one of
the methods above colorize this
layer.
Do this same step on glitter heart 1 and
glitter heart 2 layers.
For the other two heart layers do the same steps
we did above to filling them.
Selections
Select none.
Delete the original layers.

For the rest of the layers use one of the above
methods to colorize each one.
I did add eye candy's gradient glow to the
Be My word art.

Add any elements and tubes to the tag that You
want.
Give each of Your layers a drop shadow.
Effects
3D Effects
Drop Shadow
vertical 3
horizontal 3
opacity 30
blur 12.00
color black.
I used the alpha for the name on My tag.
Layers
Merge visible
Save and Your all done.


Friday, January 15, 2010

Princess


Supplies You'll need:
Scrap kit. Mine is by the lovely Amy of Tagging
The kit is called Princess and You can purchase
it at one of Her stores. Just follow the
blinkies.
At least 2 tubes from the same artist.
I am using Keith Garvey's awesome artwork.
You need to obtain a license in order to use any of his
pretty girls.
Template 78 by Sophisticated Simone.
Thank You Simone for sharing Your templates.
Mask of Choice.
Eye Candy Gradient Glow (optional).
Penta color dot.
Van Der Lee's Unplugged
Interlace (optional)
Open all supplies into psp.
Image canvas size 700x700. I know it's big but
We can crop or resize later.
Delete the white background layer.
Layers
New raster layer.
Drag it to the bottom of Your layer
palette.

With Your magic wand click this layer on Your
canvas.
Open a paper of choice and go to
Edit
Copy
Edit
Paste into selection.
Selections
Select none.

Now this step might differ depending the mask
You've chose to use.
Image
Resize
between 80 and 90 percent.
All layers unchecked.
Layers
Load/Save Mask
Load mask from disk.
Find the mask You wish to use and again
depending on the mask Your
settings might have to be changed around
slightly.

Once happy in Your layer palette delete the
mask layer.
On Group Raster layer go to
Layers
Merge group.
I added a little noise to certain parts of My mask as
I liked the look of it.
I then used Eye Candy 5's gradient glow just
to spice it up somewhat.
I like to be different or try to be lol

Highlight the large rectangle layer and use Your
magic wand to start the ants once
more.
Pick a dark color for Your foreground and a light
color for Your background and then make
on them into a gradient with the following settings.
Angle 36
Repeats 1
Invert checked.
Layers
New raster layer.
Flood fill this layer with the gradient You
made.
Selections
Select none.
Effects
Penta color dot
Place all sliders but distance on
255.
Put distance on 2.
Go to the dotted larger layer and using Your
manual color correction put the source
to white.
Target color should be a darker
color.

Do the same steps we just did with both
stars or fill them with the
gradient.
I added some noise and used a gradient
glow around each one.
These steps are optional.
If You want to do the noise go to
Adjust
Add/Remove noise
Add Noise
Uniform
20
Monochrome checked.

Highlight the white rectangle layer.
Put Your magic wand on
Add (Shift) and click on both of the rectangles.
Layers
New raster layer.
Flood fill both rectangles with Your gradient.
I did change My colors.
I made My foreground white and My background a
darker color with the other settings as above.
Selections
Select None.
I then used penta's dot and cross at the default
settings.

Highlight the frame layer in Your layer palette and
either use colorize or manual color
correction tool as above.

Open the tubes Your using and go to
Edit
Copy.
Edit
Paste as a new layer.
Resize them if needed and then with Your magic
wand go back down to the frame layer and
be sure it's highlighted and click in both of the boxes.
Selections
Invert.
Now go to both tube layers and tap Your delete key.
Now duplicate Your tubes and go to
Adjust
Blur
Gaussian Blur
radius 6.00
and place the layers blend modes onto soft light.
I also added a blinds using Van Der Lee's Unplugged
Interlace which is optional.

On the dotted smaller frame use whatever method
You did to color other things as
above.
Do the same thing with all of the word art layers.
I added a gradient glow to each of
them.

Delete all the original layers that were left over
from the template.
Add any elements to the tag You wish to use.
Add a drop shadow to everything now.
Effects
3D Effects
Drop Shadow
vertical
2
horizontal 2
blur 10.26
Opacity 35
color black.
Now pull Your tube layers down below the
frame layer.
Add Your text copyright if needed and
save as png and Your all done.



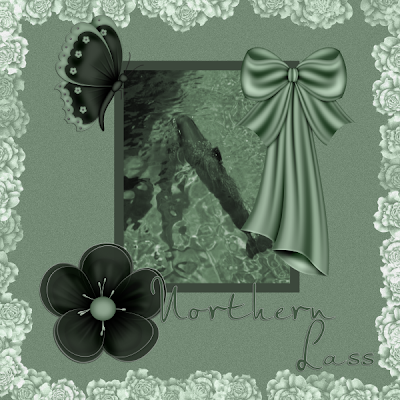

Wow Another Award!!!!!


My friend from Northern Lass Scraps gave Me
this awesome award. I love it!!!!
Thank You so much for thinking of Me
-hugs and kisses-.
I am passing this on to the following people.

Lori of Lori's Freebie List.
Kathy at Kathy's place.
Rose of Rose's Tuts n Tags.
Marta of Marta's Mayhem.

Thursday, January 14, 2010

Mommy's Nightmare


You will need the following for this tutorial:
Template by Kelly from the Misfits blog.
Thank You Kelly -hugs-.
Scrap Kit of choice.
Mine is from Northern Lass and it's called
Tubes of choice by the same artist.
I'm using the artwork of Ismael Rac.
To use his work You must first
obtain a license.
I got Mine before He moved to AMI.
Eye Candy 5 gradient glow optional.
Penta color dot optional

Open Your tube and template in psp. Minimize the tube
and on the template Shift+D and close the
original.

Click on the LgRectangle layer with Your magic
wand.
Layers
New Raster Layer.
Find a paper You like from the kit and open it.
Edit
Copy.
Edit
Paste as a new layer.
Selections
select none.
You can now go to the original layer and colorize
rectangle to fit Your paper's color or not.

On the paper layer go to
Effects
3D Effects
Drop shadow
vertical 1
horizontal 1
opacity 60
blur 10.26
color black.

Make sure Your magic wand is set to add (shift)
now in Your layer palette highlight Rectangles
layer both rectangles.
Now do the steps that We did above.

Delete the original Rectangles layer.
Effects
Alien Skin
Eye Candy 5 Impact
Basic tab
Outside Glow checked
Mask selection checked
Glow Radius 7.00
Soften Corners 35
Overall Opacity 100
Distortion amount 23
Distortion Lump Size 55
Gradient
Smoothness 100
(Just play with the settings and pick something You
like).
Give it the drop shadow from above.

With Your magic wand click on both the Right and Left
frame fills.
Layers
New Raster Layer.
Find another paper and then go to
Edit
Paste into selection.
Selections
Select None.

Delete both of the original fills.
Find the tubes Your using and open it go to
Edit Copy.
Now back onto the layer palette click on the
right frame border.
Edit
Paste as a new layer.
Move it to a position You like then back on
the frame layer go to
Selections
Modify
Expand by 8 or so.
Selections
Invert
Now highlight the tube layer and tap Your
delete key.
Selections select none.
You might have to juggle Your layers to make
the tube go under the frame layers.
Do the same for the next frame.

On the frames themselves You can either fill with
a paper or gradient the choice is Yours.
I used penta color dots and played around with it.
On the tubes I duplicated them once and
added a blur of 3 and then put the layers on
overlay.
I then gave My tubes a blinds effect using VanDerLee
interlace which is a pay to use filter
but You can use psp's blinds.

On Both of the star layers You can either colorize or
use manual color correction.
Give these layers along with the tubes and
frames the same drop shadows.
When adding the drop shadows if You have any excess
tube peeking under Your tubes just erase each
of the layers carefully.

Now add any elements You like from the kit giving
them the same drop shadows as above.
When done add Your text any effects You want and
resize it if needed. Don't forget Your copyright
if one is needed.

Sunday, January 10, 2010

Peachy Surprise


You will need the following to do this
tutorial:
Scrap Kit by Jaye from Scrapping-Delights.
If You download please leave Jaye
some love.
Tube of choice.
I am using the artwork of the wonderful
You must have a license in order to use
her work.
Mask of choice.
I used one by Vix at Vix's Psp

Open a new blank image of 700x700.
Flood fill it with white so that We can see what
We're doing.
Layers
New Raster Layer.

With Your magic wand click this new layer.
Open a paper from the kit in
psp.
Edit
Copy
Edit
Paste into selection.
Selections
Select none.
Image resize and resize this paper layer by
85 percent.
All layers unchecked.

Layers
Load/Save Mask from disk.
Load Mask from disk and find the mask You have
chosen to use.
Delete the mask layer from Your layer
palette.
Layers
Merge
Merge group.

Open up one of the frames from the kit go to
Edit
Copy
Edit
Paste as a new layer.
Place it in the middle of the canvas.

With Your magic wand click inside of the frame.
Layers
New raster layer.
Selections
Modify
Expand by 5.

Opening another paper of choice from the kit
Edit
Copy
Edit
Paste into selection.
Selections
Select none.
Pull that layer below the frame layer.

Open Your tube and go to
Edit
Copy
Edit
Paste as a new layer.
Duplicate it and pull one layer down below
the frame layer.
Block off the top layer and erase the excess
from the tube that hangs down from
the frame.
Now unblock the other tube and erase any of
the excess.

Now begin adding any of the elements from the kit
that You wish added to the tag.
Effects
3D Effects
Drop shadow
vertical 2
horizontal 2
opacity 30
blur 10
color black.
Add this to all the elements and Your tube but do
it on the tube that's below the main
tube.

Add any text You like and Your all done.
I hope You enjoyed this tutorial.


Envy


You will need the following things for
this tutorial:
Scrap kit by Northern Lass Scraps. It's
called Envy. If You download please leave
Her some Love.
Image of choice.
Mine is My baby sister's from California when
She went to Universal Studios (spoiled brat lol)
I wanna go someday too lmao.

Open a new image of 3600x3600.
Choose either one of the papers and open
it in psp.
With Your magic wand click on the blank
layer.
With the paper open in psp go to
Edit
Copy
Edit
Paste into selection.
Selections
Select none.

Open the frame that is in the kit.
Edit
Copy
Edit
Paste as a new layer.

Now place it wherever You like. If
You think it's too big resize it
a bit by going to
Image
Resize
and set the size on percent and
just dabble with the numbers
keeping all layers unchecked.

Now just add a few of the elements
that You like around the page that You have
begun to create.
Effects
3D Effects
Drop Shadow.
Vertical 3
horizontal -4
Opacity 55
Blur 5.00
Color black.

On the frame layer click inside of it
with Your magic wand.
Selections
Modify
Expand by 5.
Layers
New raster Layer.
Open the image of choice if You haven't
already and paste into
selection.
Selections
Select none.
Now You can colorize it as I did since blue
just did not go with the color
scheme lol.
Now add any text You'd like etc and
Your all done.

I hope You enjoyed this tutorial.