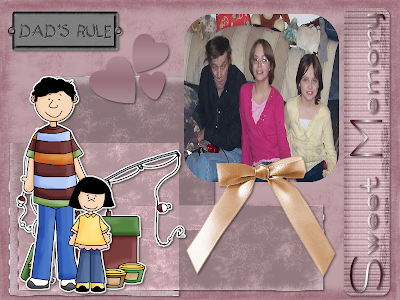
For this tutorial You will need the following:
Template by Rainy at Rainy's Templates.
She has many other templates to choose from
that could be used for this tutorial.
Scrap Kit I used or one of Your choice. It really
should be full sized though. The kit I chose is
by the awesome Sharon of As Sweet as Honey
I used the kit called It's a Dad Thing from Scraps
With Attitude. Thank You Sharon hon for letting
Me write a tutorial with Your kits -hugs and kisses-.
Images or tubes of choice. Images would be best for
this sort of tutorial but it's up to You.
The reason I wrote this tutorial is that I don't see
many around if at all and thought I'd teach those
of You that would like to use Your wonderful digital
images that You take and can't use can display them
easily in a pretty Quick Page. I hope some of You
find this of use. So let's get started
Open Your images and template in psp and minimize the
images. When opening the template Your going to lag
just a bit as it is a big file. Shift +D and close the Original.
Go to Image Free rotate and choose left at 90 degrees and
all layers checked.
In Your layer palette click on the background layer and
from the kit open a paper and go to edit copy. Selections
Select all float . Selections defloat and then on the template
edit copy paste as a new layer. Selections select none.
Back on the template choose the gradient layer and
do the same steps as above with either the same paper
or another of Your choice.
On the photo layer if Your using an image go to selections
select all selections float selections defloat and paste it
as a new layer. If Your using a tube just do as We had
done above and then add Your tube as a new layer.
Selections select none.
Delete the layer that's up above this layer. On the word
background do as We did above using a paper of choice.
Then on the hearts layer go to Image Free Rotate and
choose right at 90 degree's all layers unchecked this
time.
With Your eye dropper tool use a light and dark color
for Your foreground and background. Now on the
template with the hearts layer go to selections select
all, selections float, selections defloat, layers new raster
layer. Go to Your material palette and choose a gradient
of Your choice from the two colors You chose. Flood fill
the new layer with the color and go to selections, select
none. Effects, Texture Effects, Blinds and use the following
settings or one's of Your choice width 2, opacity 15, color
black and both boxes checked.
On the text layer You can do this a few ways. You can colorize
it, use Your manual color correction or do it with the gradient
as We did above. So it's all up to You on this one. I chose the
manual color correction. When done go to the original grey
scaled hearts and delete the layer.
Now add any elements You want from the kit. You may
have to resize a bit so if you do go to image resize and make
sure all layers is unchecked and Your sizes should be in percent
not pixel. Give all Your layers a drop shadow of choice and any
other text You wish to add if You choose and save as png and
Your done. There is Your Quick Page.


