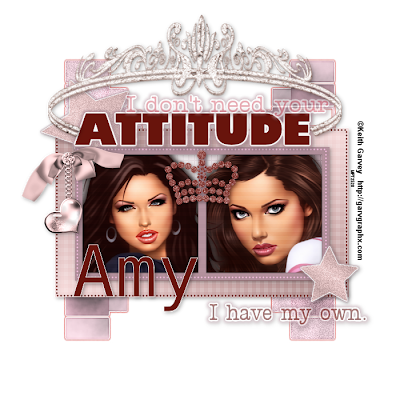
Supplies You'll need:
Scrap kit. Mine is by the lovely Amy of Tagging
Angels .
The kit is called Princess and You can purchase
it at one of Her stores. Just follow the
blinkies.
At least 2 tubes from the same artist.
I am using Keith Garvey's awesome artwork.
You need to obtain a license in order to use any of his
pretty girls.
Template 78 by Sophisticated Simone.
Thank You Simone for sharing Your templates.
Mask of Choice.
Eye Candy Gradient Glow (optional).
Penta color dot.
Van Der Lee's Unplugged
Interlace (optional)
Open all supplies into psp.
Image canvas size 700x700. I know it's big but
We can crop or resize later.
Delete the white background layer.
Layers
New raster layer.
Drag it to the bottom of Your layer
palette.
With Your magic wand click this layer on Your
canvas.
Open a paper of choice and go to
Edit
Copy
Edit
Paste into selection.
Selections
Select none.
Now this step might differ depending the mask
You've chose to use.
Image
Resize
between 80 and 90 percent.
All layers unchecked.
Layers
Load/Save Mask
Load mask from disk.
Find the mask You wish to use and again
depending on the mask Your
settings might have to be changed around
slightly.
Once happy in Your layer palette delete the
mask layer.
On Group Raster layer go to
Layers
Merge group.
I added a little noise to certain parts of My mask as
I liked the look of it.
I then used Eye Candy 5's gradient glow just
to spice it up somewhat.
I like to be different or try to be lol
Highlight the large rectangle layer and use Your
magic wand to start the ants once
more.
Pick a dark color for Your foreground and a light
color for Your background and then make
on them into a gradient with the following settings.
Angle 36
Repeats 1
Invert checked.
Layers
New raster layer.
Flood fill this layer with the gradient You
made.
Selections
Select none.
Effects
Penta color dot
Place all sliders but distance on
255.
Put distance on 2.
Go to the dotted larger layer and using Your
manual color correction put the source
to white.
Target color should be a darker
color.
Do the same steps we just did with both
stars or fill them with the
gradient.
I added some noise and used a gradient
glow around each one.
These steps are optional.
If You want to do the noise go to
Adjust
Add/Remove noise
Add Noise
Uniform
20
Monochrome checked.
Highlight the white rectangle layer.
Put Your magic wand on
Add (Shift) and click on both of the rectangles.
Layers
New raster layer.
Flood fill both rectangles with Your gradient.
I did change My colors.
I made My foreground white and My background a
darker color with the other settings as above.
Selections
Select None.
I then used penta's dot and cross at the default
settings.
Highlight the frame layer in Your layer palette and
either use colorize or manual color
correction tool as above.
Open the tubes Your using and go to
Edit
Copy.
Edit
Paste as a new layer.
Resize them if needed and then with Your magic
wand go back down to the frame layer and
be sure it's highlighted and click in both of the boxes.
Selections
Invert.
Now go to both tube layers and tap Your delete key.
Now duplicate Your tubes and go to
Adjust
Blur
Gaussian Blur
radius 6.00
and place the layers blend modes onto soft light.
I also added a blinds using Van Der Lee's Unplugged
Interlace which is optional.
On the dotted smaller frame use whatever method
You did to color other things as
above.
Do the same thing with all of the word art layers.
I added a gradient glow to each of
them.
Delete all the original layers that were left over
from the template.
Add any elements to the tag You wish to use.
Add a drop shadow to everything now.
Effects
3D Effects
Drop Shadow
vertical
2
horizontal 2
blur 10.26
Opacity 35
color black.
Now pull Your tube layers down below the
frame layer.
Add Your text copyright if needed and
save as png and Your all done.


No comments:
Post a Comment