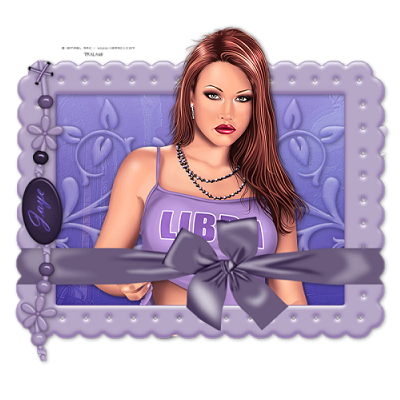
Scrapkit by Jaye called Lilac & Purple Mini. This kit is free and so pretty.
Thank You so much Jaye for letting Me use Your kits and goodies for My tutorials -hugs and kisses-.
Tube of choice. I am using the wonderful work of Rac and You can find His tubes at AMI. You need to purchase a license in order to use any of His work.
FM Tile Tools Emboss (optional).
Background image of choice or the one I'm using. I got this from a sharing group so if it's Your's please let Me know and I will either remove it or give You credit.
Font of choice or Mine.
Open the background, tube, and font. Minimize the font into Your taskbar. From the kit find one of the frames You like. I used the square one it was just so pretty. Image canvas size 700x700. From the tube Your using find two colors You like. In the materials palette choose the gradient tab angle and repeats on 0 invert not checked and style linear.
If Your using the frame I am with Your magic wand click inside all the parts and make sure the ants are surrounding each of those pieces. Layers new raster layer and flood fill it with Your gradient and pull this down under the frame but keep the ants marching. On the background image I supplied go to edit copy and edit paste as a new layer. Selections invert and tap the delete key on Your keyboard. Put this layer's blend mode to soft light and the opacity down to about 40.
Effects FM Tile Tools Blend Emboss and use the default settings on the background image layer and do this about twice. If You don't want to use this filter and can't get it as it's a pay to use one You can go to Effects Texture Effects Emboss in psp and use this one. This is up to You.
Now open the tube again go to edit copy and edit paste as a new layer. Place it where You like and then on the frame layer duplicate it. Place the duplicate above the girl and with Your eraser tool erase the top so that Her head isn't under the frame. On the tube go to Effects 3D Effects Drop shadow vertical and horizontal on 2 opacity 40 blur 10.00 color black and repeat this again with the vertical and horizontal on 0. Give Your original frame layer the very first drop shadow.
Now We are going to start adding the elements. Find the Minikit1 beaded string and paste it as a new layer and place it where You like and give it the same drop shadow We just did the frame. Now add the Minikit 13 doodle to Your image and place it like mine (using My tag as a reference). Now duplicate this layer and go to image mirror it. Layer's merge down and give it the same drop shadow as above and place the blend mode on Luminance and the opacity to about 65 or so.
Make sure the font is open and choose Your text tool but be sure Your foreground color is back on the solid color. Make sure in the pull down of fonts the one I supplied is chosen or one of Your own if You chose to do it that way put the size of the font to 250 and type out Your name. Image Free Rotate 90 degree's left all other boxes unchecked. Put the text on the tag of the beaded string. Convert it to raster Layer. Now just add Your copyright and Your done.


No comments:
Post a Comment