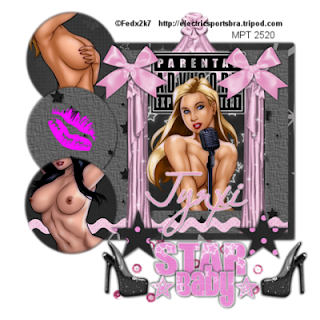
I used template 14 made by Chica here. Scroll down until You find it.
I used a Scrapkit called She's a Star by Pink Princess Scraps and You can find that here.
Thank You very much Vicki for allowing me to use Your kits
in My tutorials -hugs-.
If You don't have this scrap and can't get it just follow
along using another and my tutorial as a guide.
Eye candy 4000 gradient glow which a pay filter and You
can get it here.
Xero porcelain a free filter here.
Choice of Tubes. I used Fedx2k7 and You can find his
tubes here. I got them when they were listed as free tubes on MPT's free tube
page.
Let's start off by duplicating Your Template Image by holding
down Your shift key + D and after that go to image canvas size 700 you can resize it later.
In Your layer palette choose the frame layer and selections select all. selections select float. selections defloat..Go to the kit
and choose a paper from it and copy and paste as a new layer. selections invert and hit the delete key on your keyboard.selections select none.
Effects-3D effects-drop shadow with the following settings 2, 2, 65, 5.00 and color black click ok and then repeat it with -2, -2 leaving the other's as they are and click ok.
In Your layer Palette choose your Back layer making sure it's highlighted and go to selections-select all-..selections-float-..
selections-defloat-..selections-modify-contract by 7-..Find another paper from the kit and copy and paste as a new layer..Selections-invert-and hit delete on Your keyboard and selections-select-none..Then delete Your back layer leaving
Your paper back..
Again repeat the steps with the other papers..
In Your layer palette choose circle 3 and make sure it's highlighted and do as you did with the other's papers.And when You have the paper placed and the circle 3 layer deleted do the drop shadow as you did above for the frame layer.Repeat those same steps for the other circle layers..
Since I used the black papers from the kit I chose to delete the
two lip layers leaving the pink one's..
In Your layer palette highlight the Advisory sign and go to effects eye candy 4000-gradient glow- and use the following settings.. In the basic tab glow width 3.00 soft corners 25, over all opacity 100 and a check in the draw only outside selection..In the color tab choose thin setting color white and opacity 100 and hit ok..
For both of Your star layers do as You did with the cirlces and other's adding the same drop shadow..
In Your layer palette highlight the wordart2 layer and do as you did with the rest of the layers with papers except do the same
gradient glow with eye candy as you did on the Advisory sign and then add the same drop shadows..
Now with the other wordart and stars I filled them each with the same paper and gradient glow followed by the drop shadows. Again this up to You..I did it this way because it kind of matched the pink lips we still had left on that other circle..And I felt kinda lazy as it's like 2 am here LOL
Now then choose Your raster 2 in Your layer palette and go to selections-select all- again selections-float-..selections-defloat- and then selections-invert- and paste your new tube into the square and place it as you like it and hit delete on your tube layer.selections-select none-
Do the same on Your top and lower cirlce using my tag as an example and place them how you like it doing as you did for your raster 2 layer..
On each of the tube layers go to effects-xero-poreclain on the default settings.
Now add any of the elements from the kit that you want placing them all where you like..
Add Your text and then merge layers visible
And now add your copyright if you have one and your done.


No comments:
Post a Comment