Showing posts with label Scraps With Attitude. Show all posts

Tuesday, January 19, 2010

Sweet Candy Kisses


Supplies You'll need.
Template by Tamie.
Just scroll down and You will find them
and other great templates.
Scrap Kit of choice or the one I'm using By
She also has an ad on available if You can
not get this kit.
Tube of choice.
Eye Candy 5 Gradient Glow (optional).
Penta VTR2 (optional).
Mask of Choice.
I used Vix Mask 177. You find this under
goodies.

Open the template and tube in psp.
Minimize the tube.
Shift+D on the template and close the
original.
Image
Canvas Size
800x800.
Delete the copyright and white background layer.

Layers
New raster layer.
Layers
Arrange
Send to bottom.

Find a paper from the kit You like.
Edit
Copy.
Use Your magic wand and click on Your
canvas.
Edit
Paste into selection.
Selections
Select none.

Layers
Load/Save Mask
Load from disk.
Find the mask You want to use. Sometimes You
need to invert and sometimes not.
Just use what You prefer.

In Your layer palette delete the mask layer.
Layers
Merge group.
Adjust
Add/Remove noise
Add noise
Uniform checked
Noise 60 percent
Monochrome checked.

Highlight the glitter circle layer.
There are two ways that You can do this next step.
We want to colorize this layer.
I usually use manual color correction but I know some
versions of psp don't have it so if You can't
find it just use colorize.
Adjust
Hue and Saturation
Colorize.

Highlight the pink circle layer and with Your
magic wand click on Your working
canvas.
Find another paper of Your choice.

Edit
Copy.
Edit
Paste as a new layer.
Position it however You like it.
Selections
Invert
Tap the delete key on Your keyboard.
Delete the original circle
layer.

Highlight the half circle in Your layer using
Your magic wand click it in Your
working canvas.
Layers
New raster layer.
Find another paper and open it go to
Edit
Copy
Edit
Paste as a new layer.
Selections
Select none.
Effects
Penta VTR2
Line Distance 26
Line Width 0
Contrast 169
Ghost 0.
Delete the original layer.

Highlight the half circle 2 layer and using one of
the methods above colorize this
layer.
Do this same step on glitter heart 1 and
glitter heart 2 layers.
For the other two heart layers do the same steps
we did above to filling them.
Selections
Select none.
Delete the original layers.

For the rest of the layers use one of the above
methods to colorize each one.
I did add eye candy's gradient glow to the
Be My word art.

Add any elements and tubes to the tag that You
want.
Give each of Your layers a drop shadow.
Effects
3D Effects
Drop Shadow
vertical 3
horizontal 3
opacity 30
blur 12.00
color black.
I used the alpha for the name on My tag.
Layers
Merge visible
Save and Your all done.


Wednesday, December 30, 2009

Candy Coated Love


You will need the following supplies for this tutorial:
Scrap kit of choice or Mine.
It's called candy coated and can be found
It's made by the very talented Heather at

Template made By DBA. Thank You Ali
for allowing Us to use Your wonderful templates for
our creations. You will have to look under

Paint Shop Pro but if You know Your programs well
enough You could probably do this with any
of them out there.

Tube of choice. I used a tube by Jason Patterson
which I acquired through MPT's yahoo group.
You have to have a license in order to use any of his
artwork.

Now let's get started. Open Your template in psp and
duplicate it by pressing shift+D and close the
original one.

Click the background layer with Your magic wand and
opening a paper of choice from the kit go to edit copy
and edit paste as a new layer and then selections
select none.

(Side note here. Now depending which psp version
Your using Your manual color correction tool will be
under Your customize settings when You click on psp's
background. So go to the area under Your tag and
right click on customize and under commands You will
see tools click on that and look for the color correction
tool on the right hand side and place it on one of Your
toolbars in psp. Just drag it up there. I am not sure where
it is in versions other than psp 10 sorry).

Open another paper or element from the kit and choose
a color that goes with Your tag and keep this open
behind Your canvas but to the left or right of it so that You
can see it.

On the Group Raster Layer use Your manual color
correction tool and for the colors on source click
the merged layer and that shade of grey will be
showing in the box. On the target choose the color
from the paper or element You have chosen and click
ok when You like how it looks.

Click on the raster layer 2 in Your layer palette with
Your magic wand click on the heart and from
the kit Your using choose and paper from it and
go to edit copy and edit paste as a new layer.

Selections select none. On raster layer 5 use Your
color correction tool and use a color of choice
to color the hearts frame.

Delete layers 4 and 6.

For raster 1 and 2 You can either do the paper
steps once again or the manual color
correction tool. It's up to you.

On raster layer 7 We are going to work this
in a few steps since the hearts are two
different colors.

So go to Your manual color correction tool
once again and for the colors of source
choose black and whatever other
color You have used for Your creation.

Now on that same layer let's use Your
freehand selection tool and draw
around all the other smaller hearts that
You didn't did get colored. Be sure
the lasso tool is set to add (Shift) so You don't
have to hold down Your shift key. Once
this is done color them the same way
as above.

On layers 8 and 9 do the same as We have done
with the hearts only You won't have to use
Your free hand tool.

Now we are going to add our tube. Go to
raster 3 and go to edit copy on your
tube and then edit paste as
as a new layer.

Duplicate this layer and pull one of them
under the frame layer and turn the
visibility off on the top layer. now just carefully
erase around the frame on the
outer edge.

Now go back to Your top layer and erase
it doing the same don't worry this is
such a faultless step it will never
look marred if Your a terrible tuber as
I am lol.

Ok now make sure the top layer is still selected
and begin to add any of the kits elements
that You like.

If Your using My kit You will have really size
down. I did this by going to image resize
make sure that percent is chosen and that all layers
are unchecked. I used the numbers between 5
and 20 for all of My elements.

Now let's add drop shadows to all of the things in
our tag. Effects 3D Effects Drop Shadow
with the following settings
vertical 2
horizontal 2
opacity 40
blur 5.00
color black.

Now don't add a drop shadow onto the top tube
that You used for Your heart instead
drop shadow the one below the frame layer so
that is shows no flaws. If You have any
hangers just erase them to
smooth out the tag.

Now add any text You wish and go to layers
merge visible save as png and Your
all done.

I hope You enjoyed this tutorial.


Thursday, December 17, 2009

A Father's Love


For this tutorial You will need the following:
Template by Rainy at Rainy's Templates.
She has many other templates to choose from
that could be used for this tutorial.
Scrap Kit I used or one of Your choice. It really
should be full sized though. The kit I chose is
by the awesome Sharon of As Sweet as Honey
I used the kit called It's a Dad Thing from Scraps
With Attitude. Thank You Sharon hon for letting
Me write a tutorial with Your kits -hugs and kisses-.
Images or tubes of choice. Images would be best for
this sort of tutorial but it's up to You.

The reason I wrote this tutorial is that I don't see
many around if at all and thought I'd teach those
of You that would like to use Your wonderful digital
images that You take and can't use can display them
easily in a pretty Quick Page. I hope some of You
find this of use. So let's get started

Open Your images and template in psp and minimize the
images. When opening the template Your going to lag
just a bit as it is a big file. Shift +D and close the Original.
Go to Image Free rotate and choose left at 90 degrees and
all layers checked.

In Your layer palette click on the background layer and
from the kit open a paper and go to edit copy. Selections
Select all float . Selections defloat and then on the template
edit copy paste as a new layer. Selections select none.

Back on the template choose the gradient layer and
do the same steps as above with either the same paper
or another of Your choice.

On the photo layer if Your using an image go to selections
select all selections float selections defloat and paste it
as a new layer. If Your using a tube just do as We had
done above and then add Your tube as a new layer.
Selections select none.

Delete the layer that's up above this layer. On the word
background do as We did above using a paper of choice.
Then on the hearts layer go to Image Free Rotate and
choose right at 90 degree's all layers unchecked this
time.

With Your eye dropper tool use a light and dark color
for Your foreground and background. Now on the
template with the hearts layer go to selections select
all, selections float, selections defloat, layers new raster
layer. Go to Your material palette and choose a gradient
of Your choice from the two colors You chose. Flood fill
the new layer with the color and go to selections, select
none. Effects, Texture Effects, Blinds and use the following
settings or one's of Your choice width 2, opacity 15, color
black and both boxes checked.

On the text layer You can do this a few ways. You can colorize
it, use Your manual color correction or do it with the gradient
as We did above. So it's all up to You on this one. I chose the
manual color correction. When done go to the original grey
scaled hearts and delete the layer.

Now add any elements You want from the kit. You may
have to resize a bit so if you do go to image resize and make
sure all layers is unchecked and Your sizes should be in percent
not pixel. Give all Your layers a drop shadow of choice and any
other text You wish to add if You choose and save as png and
Your done. There is Your Quick Page.


Friday, October 2, 2009

Autumn Splendor


You will need the following supplies for this tutorial.
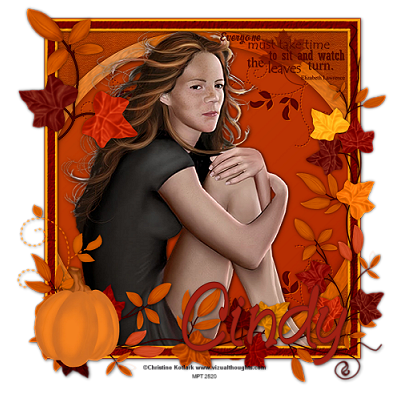
Scrap Kit by Cindy.
It's called Autumn Splendor.
Thank You Cindy for allowing Me to use Your
kits in My tutorials -hugs and kisses-.
If You can't get this kit any will do.
Tube of choice. I am using a tube by the
wonderful artist Christine Kotlark.
You can find Her tubes at MPT.
Please don't use any of Her work without
the proper license.
Font of choice.

Open an new image 800x800. I know it's big but You can
crop or resize it later. Make sure it's transparent.
From the kit find a frame You like. Open it and go to
edit copy and edit paste as a new layer on Your
transparent image. If Your using the same kit
You'll have to resize the frame by 85 percent so to
to image resize all layers unchecked and resize it by
85 percent.

With Your magic tool click inside the frame. If Your using
the kit I am You'll have to hold down the shift key
while selecting all the area's around the pumpkin and leaves.
Selections modify expand by 10 or so. Now go to edit paste
as a new layer. Selections invert
and tap on the delete key on Your keyboard.


Selections select none. Pull this paper layer below Your
frame layer. You might have a missing piece in the frame so
use Your magic wand and click it or use Your shift key to
select multiple one's and go to selections modify expand by 10
or so again and do the delete step again.


Now make sure the layer that You just did if You had a
missing piece go to layers merge down be sure either
one of the paper layers is chosen when You do the merge.

Go to Your tube. Copy and paste it as a new layer. On My tube
I had to resize it by 160 percent to go with the size of the
frame. Slide the tube under the frame layer and with
Your eraser tool erase any of the overlap.

Effects 3D Effects Drop Shadow vertical and horizontal 2
opacity 55 blur 10.00 and the color black.
Repeat this drop shadow with the horizontal and the vertical
set to 0.

Now We'll begin to add any of the elements from the kit
that We like. I used a journal box that came inside
the kit and resized it a bit then erased the overlap once again
as We did our main tube. Give it the same drop shadow
with the 0 settings.

I added a word art and some leaves that came with the kit
and gave it the same drop shadows as above. I also
added Cindy's name to the tag. I used Fountain Pen and
as always created it as a vector and then converted it to a raster
layer and added a drop shadow to it. I also then added that
same drop shadow to My frame.

I added the artist's copyright and My license number and then
resized My tag to 500x500 pixels all layers checked and
merged visible. Save as png and Your all done.


Monday, September 21, 2009

Enchanted Secrets


You will need these things to complete this tutorial.
Scrap Kit of choice or the one I'm using By
It's called Enchanted Secrets. It comes
in both tagger and full size.
Mask 169 by the wonderful Chelle.
You will need to download that pack of masks
but they are so worth the download.
Don't forget to leave her some love when getting
this mask.
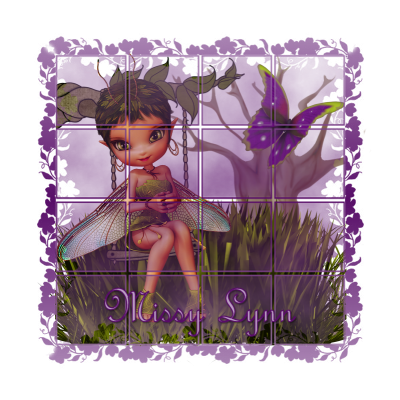
Tube of choice. I will be using Missy Lynn's tubes.
Font of choice.


Open a new blank canvas 800x800. I know it's big
but You can resize it later. Open the tube and
mask in psp. Flood fill Your canvas with a color or
gradient of choice. I used a gradient angle 0 repeats
1 invert checked and style linear.

Go to layers new mask layer and load choose the image
You have open in psp. source luminance checked the
other without checks. If it doesn't look right to
You then You may have to invert the mask. I had to
load Mine from disk as I have My psp pointing to
My masks from elsewhere.

Now in Your layer palette delete the mask layer and
click on the other mask layer and merge group. Now
You just need to place all Your elements from the
kit that would go with it and slide each under the
window layer. I didn't give any a drop shadow
this time as I wanted to keep it somewhat of
a magical feel type tag. I did use My eraser
tool where there were overhangs on the edges.

Now click Your font tool and choose a font
You think would go nicely for Your tag and add the name
turn this into a raster layer and add a drop shadow of choice.
Just add Your copyright if You need one and save as png and
Your all done.


Saturday, September 19, 2009

Whispers


You will need the following for this tutorial.
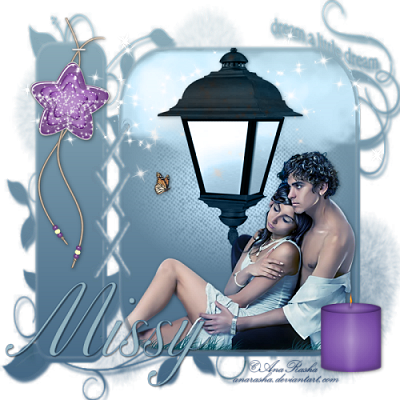
Scrapkit of choice or the one I'm using by Missy. It's called Midnight Whispers. It comes in both tagger and full size. I personally think it's worth the purchase there is so much that can be done with this kit.
Thank You Missy for allowing Me to write tutorials with this kit -hugs and kisses-.
Tube, font and mask of choice or Mine.

This tutorial is one that is not generally a style I use alot but I wanted to try to work with some of My masks more that I'm always getting through share's and as challenges in My groups. Some of them are just so pretty and alot of fun to play with. Anyhow here We go.

Open the mask and tube in psp. Choose two colors from the tube You like. Turn the foreground into a gradient angle and repeats 0 invert unchecked and style linear. Open a new image canvas 800x800 blank and flood fill it with Your gradient.

Go to layers new mask layer from image and on the pull down choose the mask You have open in psp source luminance checked and everything else not checked and click ok. In Your layer pallete delete the mask layer and then right click and merge group. Now open Your tube go to edit copy and edit paste as a new layer. Place it onto the mask (use My tag as a reference) and pull it down a little bit if You choose to do so. Now hightlight the mask layer in the layer palette and go to selections select all float selections defloat and selections invert. Choose the tube layer and hit delete and then selections select none.

With Your eraser tool erase the excess that's on the edges of the frame and the overlap that's outside of it and on the leaves. Effects 3D effects drop shadow vertical and horizontal 2 opacity 40 blur 10.00. Begin to add Your elements. I added the lamp from the kit and resized it and erased the top just a bit to get the hook off so that it looked a little bit with the mask and then I gave it the same drop shadow as above. I also added some of the elements I liked and gave them all the same drop shadows. You could use brushes word art anything. The possibilities are so endless with this mask and tag so try to experiment and see what You like most.

Click on Your font tool and with the same colors You used before but set to regular choose the font that I supplied and type out Your name or whatever it is that You might be typing. I used size 75 vector and then changed it to a raster layer. Now You could also make the name rotate to go along the left side border but I chose not to this time. Give it the same drop shadow as before only change the blur to about 2 or so. Now copy and paste the copyright to Your tag and go to image resize by 55 percent or so and move it where it looks good to you. Now resize or crop Your image if needed and save as png and then Your done.


Tuesday, September 15, 2009

Glamour


You will need the following things for this tutorial.
Scrapkit of choice or the one I'm using by Rieneke. It's called Madness.
Thank You Rieneke for letting Me use Your kit in My tutorials -hugs and kisses-.
Template 101 by Rachel at Scraps of Enchantment
Thank You Rachel for sharing Your templates and other goodies with Us -hugs-.
Tubes of choice. I am using the wonderful work of Ismael Rac. You can find His tubes at AMI. You need to purchase a license in order to use any of His tubes.
Xero Fritillary

Open the template and tube in psp and minimize the tube. Shift+D on the template to duplicate it closing the original now delete the copyright layer as We don't need it. Find a color from Your tube You like and with Your eye dropper tool click on it.

On the PinkGlitter layer go to adjust Hue and Saturation Colorize and from the color You used click on the materials palette and use the H and S numbers and type them into the colorize slots where You see Hue and Saturation. You might have to fiddle with the numbers in order to get something that You might like.

Choose the Glamour layer and with Your magic wand click each letter and all now should be selected with marching ants. Layers new raster layer and flood fill this layer with a color or gradient of choice. Now paste Your tubes and position them along the text. After they are in place go to selections invert and tap Your delete key on each of those layers. Selections select none. Layers merge down all those tube layers until all the tubes are merged together.

Duplicate this tube layer and go to adjust gaussian blur 4. Place the original layers blend mode on Luminance and the copy blurred one on Luminance (L) put the opacity on about 80 or whatever looks good to You. I also gave it a blinds effect by going to effects texture effects blinds.

On the glamour text layer go to selections select all selections float selections defloat selections invert and choose the tube layer and tap on Your delete key. This will get rid of the blurred area's outside of Your text. Selections select none. Now back to the glamour word text and go to effects 3D effects drop shadow vertical and horizontal 2 opacity50 blur 7.00 color black. Delete the original text layer.

On the girl layer colorize it again to a color You like. On the pink strip I pasted a paper over it and then lowered the opacity. Another option You have is floating it and adding a new layer and flood filling the spaces and lines with 2 different colors. To do the paper find one You like go to edit copy and on the template go to selections select all selections float selects defloat. Edit paste as a new layer selections invert and tap the delete key. Selections select none. I slid the opacity down to 63 but of course this will vary depending on shades and likes.

Choose the Black bg layer and using Your magic wand hold down the shift key and click both area's on Your canvas and flood fill with a color or gradient of choice. Selections select none. Effects xero fritilliary 5 30 10 0. Effects 3D effects drop shadow vertical and horizontal 2 opacity 30 blur 10.00 color black. Delete the original layer.

On the dotted lines place the blend mode on Luminance. Give it the same drop but change the blur to 7.00. Now add Your main tube to the tag. You may have to change the canvas size in order to do so. You do this by going to image canvas size 700x700 and if You have excess tube just erase it with Your eraser. Duplicate the tube after You have it placed and again do the blur and then slide the opacity to about 70 or so and add a drop shadow to the bottom tube.

On the pink circles place this layer onto Luminance. So sorry I overlooked this layer. Add a drop shadow to it. Now add any of the elements from the kit You like and Your text. Merge Your layers resize or crop if needed add Your copyright and save as png.


Beware


You will need the following materials to complete this tutorial.
Scrapkit of choice or the one I'm using by Kelly. It's called Neon Halloween.
Thank You Kelly so much for letting Me use Your kits in My tutorials -hugs and kisses-.
Template 104 by Beth at BlissfullyBeth.
Thank You Beth for sharing Your templates -hugs-.
Tube of choice. I am using a tube by Keith Garvey and You can find all His wonderful tubes at MPT. You need a license to use any of His work.
Wordart of choice. I got Mine from Sarah. It is a PTU so I can't share sorry.

Open the tube and template in psp and minimize the tube. Shift+D on the template to duplicate it and close the original. Delete the copyright and background layer. We won't be needing either one of them. In Your layer palette choose the LG Black Rect layer and using Your magic wand click inside of it on the canvas. Layers new raster layer and flood fill it with a color or gradient of choice.

On My colored layer I also lowered My opacity to 70. Adjust Add/Remove Noise Add Noise Uniform checked Noise 25 Monochrome checked. Delete the original layer. Choose the LG Orange Rect Layer and using Your magic wand click on the canvas. Layers new raster layer and flood fill it with a color of choice or graident. Effects 3D effects drop shadow of choice or mine vertical and horizontal 2 opacity 40 blur 8.00. Repeat the drop shadow changing the vertical and horizontal to 0. Delete the original layer.

Choose the large text layer and holding down Your shift key click on each one. Once all selected add a new layer and flood fill it with a color of choice and selections select none give it the same drop shadow We used on the frame layer. Delete this original layer. On the text line go to selections select all selections float selections defloat. Layers new raster layer and flood fill this with a color of choice. Selections modify expand by 3. Layers new raster layer and flood fill this with white or another very light color and selections select none pull this under the text layer You filled previously. On the text layer go to effects 3D effects drop shadow vertical and horizontal 0 opacity 70 blur 0.00 color black. Delete the original layer.

On Your tube paste as a new layer and give it a drop shadow of choice I used vertical and horizontal 2 opacity 70 blur 10.00 color black. Now add Your word art if Your using some and the elements from Your kit of choice. Type out Your text give it a drop shadow of choice. Add Your copyright and save as png and Your all done.

Monday, September 14, 2009

Desire


For this tutorial You will need the following things.
Scrapkit of choice or the one I used by Rieneke. It's called Insane.
Thank You Rieneke for letting Me use Your kits in My tutorials -hugs-.
Template 32 by Beth from BlissfullyBeth.
Thank You Beth for sharing Your templates -hugs-.
Tube of choice. I used the artwork of Ismael Rac Who is now at AMI. You need a license in order to use any of His artwork.
Eye Candy 5 Impact Gradient Glow (optinonal).

Open Your tube and template in psp minimizing the tube for now. Shift+D on the template to duplicate it and close the original also delete the copyright layer as We won't be needing it any longer. Image canvas size 700x700. I know it's big but You can crop or resize later. On the text layer go to selections select all selections float selections defloat. Layers new raster layer and flood fill it with a color or gradient of choice. Selections select none. Effects Eye Candy 5 Impact Gradient glow. I just used the default settings. Add a drop shadow of choice or use My settings. Effects 3D Effects drop shadow horizontal and vertical 2 opacity 50 blur 2.00 color black. Delete the original layer.

With Your magic wand click on the gray rectangle layer inside of it. Selections modify expand by 3. layers new raster layer and fill it with a color or gradient of choice. I kept My selection going and found a paper I liked and went to edit copy and then pasted as a new layer. Selections invert and then I tapped on My delete key and selections select none. I put the blend mode on screen and the opacity down to 65. This is optional though. I just like a texture feeling without having to mess with a bunch of plug ins to get the desired effects.

On the original gray rectangle layer click on the black strip with Your magic wand. Layers new raster layer and flood fill it again with a color or gradient of choice. Selections select none. Effects texture effects weave with the following settings gap width and opacity 1 weave color black gap color I chose the lighter shade of My original color I filled it with and fill gaps is checked. I also applied the same gradient glow. Effects 3D effects drop shadow vertical and horizontal 2 opacity 100 blur 10.00. I repeated the drop shadow with the vertical and horizontal on 0. Delete the original layer.

With Your magic wand click on the white circle. Layers new raster layer and flood fill with a color of choice. Selections select none. Effects texture effects blinds width 2 opacity 10 color black both boxes checked. I did this twice. On Your tube go to edit copy edit paste as a new layer and position it into place. Now what I did on the area's that She overhung I erased the template parts of the cirlces and set her so that it was just right on the line of the frame. Effects 3D effects drop shadow with the following settings vertical horizontal 2 opacity 50 blur 7.00 color black.

On the dotted circle You may have to zoom in but go to selections select all selections float selections defloat. Layers new raster layer and flood fill with a color or gradient of choice. I added the same gradient glow and drop shadow as before. Delete the original layer. Now all that is left is adding the elements You like artist's copyright and Your name and save as png and Your all done.

Scraps With Attitude SALE!!!!!!!!!!!!!!


The Gals at Scraps With Attitude are Doing it again.
Today and tomorrow only. So get Your kits and
accessories at they're lowest prices and show them
some support.

Good Girl With Alot of Bad Habits


You will need the following things for this tutorial.
Scrapkit of choice or the one I'm using by Tiny. It's called Coffee Break.
Template 68 by Beth at BlisfullyBeth.
Thank You Beth for sharing Your creative templates -hugs-.
Tube of choice. I am using the tube Tiny included in Her kit.

This one should be a quickie for You all. Ok open the tube and template in psp and minimize the tube. On the template Shift+D to duplicate it and close out the original one and delete the copyright layer as We dont' need it now.

Choose one of the raster layers and using Your magic wand click it and go to layers new raster layer and flood fill it with a color of choice or gradient. Do this with all the rectangle layers. When Your done with this step delete all the original layers and close off all layers except the one's You just did and make sure of these layers are chosen in Your palette go to layers merge visible. Give this layer a drop shadow of choice and then unblock all Your layers.

On the brackets select them as You did above adding a new layer and flood fill with a color of choice and then go to effects texture effects weave with the following settings gap and width 1 opacity 5 weave color black and for the gap color I used the light color in My tag. Give this the same drop shadow as You did before.

On the text layer I used My magic wand on the letters at the top of the tag and clicked each one added a new raster layer and filled it with a color from My tag and used a very light blinds effect by going to effects texture effects blinds and then I added a drop shadow. Then I did the same with the bottom text only this time I didn't add the blinds effect.

Now just add your elements with drop shadows from Your chosen kit. Add Your name copyright and save as png and Your done.


Spooky


You will need the following things for this tutorial.
Scrapkit of choice or the one I'm using by Tiny. This kit is called Happy Holloween.
Template 101 By Beth at Blissfully Beth.
Thank You Beth for sharing Your templates -hugs-.
Tube of Choice I am using the artwork of Suzanne Woolcott. You need a license to use any of her artwork.
Thank You so much Kathy for Your wonderful gift -hugs and kisses-.

Open Your tube and template in psp and minimize the tube. Shift+D to duplicate Your template and close out the original and also delete the copyright We won't be needing it. Find a color from the tube You chose and on the Rectangle layer use Your magic wand and click inside of it and go to layers new raster layer and flood fill this with that chosen color. Selections select none. Do this same step on the Orange rectangle layer. (Again I am guilty of playing with the papers and inserting them on top of my filled in layers and messing around with the blend modes). Remember to delete Your original layers.

On the frame layer You filled in go to effects 3D effects drop shadow and give it a drop shadow of choice or use My settings vertical and horizontal 2 opacity 40 blur 5.00 color black. On the spooky text layer in the layer palette I put the blend mode onto burn but for You it might vary and You might decided to just leave it black which is just fine. Just remember this is Your tag so do something You like not what You think I would like or make it totally look like Mine. This is just a guideline only and as such just make this Your own.

Choose the black dotted layer and go to selections select all selections float selections defloat and layers new raster layer. You might have to zoom in to see all the dots and then flood fill it with a color of choice and give it the same drop shadow We used from above. Choose the black star layer and with Your magic wand click on it layers new raster layer and flood fill with a color or gradient of choice. Do the same exact steps for Your orange star frame. Giving it the same drop shadow as before.

Add Your tube and elements of choice giving them the same drop shadow. Add Your name copyright and save as png and Your all done.


Girlie Girl

You will need the following things to complete this tutorial.
Scrapkit of choice or the one I'm using by Natasha. It's called Girlie Girl.
Template #64 by Beth from Blissfully Beth. You will have to download the template pack 61-70. She also has some other great templates and they are worth the download.
Thank You Beth for sharing Your templates -hugs-.
Tube of choice. I am using a tube by Rac and You find His tubes at AMI. You need a license in order to use any of His work.
Brushes or wordart of choice (optional).

Open the tube and template in psp. Minimize the tube for now. Shift+D to duplicate the template and close out the original. Delete the copyright as We wont be needing this any longer. In Your layer choose one of the stripes layers and using Your magic wand hold down shift as You click both stripes and then in Your layer palette click on the other stripes layer and from the kit choose a paper you like edit copy and edit paste as a new layer. Selections invert and hit the delete key on Your keyboard. Selections none and now delete the original layers. Effects 3D effects drop shadow vertical and horizontal 2 opacity 60 blur 5.00 color black.

The next step is optional in the way You wish to do it. Choose the frame background layer and use Your magic wand and click inside of it. Selections modify expand by 2. Now You can add a new layer and flood fill it with a gradient of choice or add a paper or do both. I chose to to do both one by adding a new layer and filling it with a gradient that matched My tube and then I chose a paper and did as above only I changed the blend mode in the layer palette to overly and put the opacity to about 65. You could now add either word art's or brushes of choice if You chose to do so. Either would work well or even place a line of text for the box too with Your text tool. There are endless opportunities for this template.

Choose the frame layer in Your layer palette and use Your magic wand and click it layers new raster layer and flood fill with a color of choice. Again I added another paper to it too and changed the blend mode. I just find it gives it a prettier texture when You don't feel like fiddling around with plug-ins and other effects. Give this layer a drop shadow of choice I used vertical and horizontal 1 opacity 45 blur 7.00 color black.

Delete all the original layers if You didn't do it before that We've already worked with and then go to Your tube and paste it as a new layer and place it where You like it. I had to resize by about 75 percent. You do this by going to image resize find a number to resize it by and percent all layers unchecked. Layers arrange bring to top. Give it a drop shadow of choice I used vertical and horizontal 0 opacity 25 blur 10.00 color black.

Do the stars as We have done all the other layer's. Don't forget Your drop shadows. On the text layer go to selections select all selections float selections defloat. Layers new raster layer and flood fill with a gradient or color of choice. Selections select none now give it a drop shadow. Now just add the elements You like from whatever kit Your using adding drop shadows. Add Your text where You like a drop shadow copyright and save as png and Your all done.


Sunday, September 13, 2009

Spooky Hollow


You will need the following things to complete this tutorial.
Scrapkit by Tootypup. It's called Spooky Hollow. This kit
comes in both tagger and full size.
Thank You Both Susan and Stina for allowing Me to use this kit in My tutorial.
I am sure if You can't get this kit You could use any other's You might have and adapt it to this one using My tutorial as a guide.
You will need a tube of choice though I will be just sticking to the tubes in the kit.

Go to edit copy and edit paste on one of the houses of choice. Move it over just slightly. Effects 3D effects drop shadow vertical and horizontal 2 opacity 50 blur 10.00 color black. Repeat it again with the vertical and horizontal on 0. Paste the gate as a new layer and give it this drop shadow vertical and horizontal 0 opacity 50 blur 2.00 color black.

Add the tp-window2 as a new layer and move it up so that it's even with the house and moon. Don't worry We'll fix the bottom to match with the house soon. Give it a drop shadow with the following settings vertical and horizontal 2 opacity 50 blur 5.00 color black.

Add the tall grass as a new layer and slide this under the house making sure it went over the blank spots of the window's layer edge we added just a few minutes ago. Paste one of the ghost's
as a new layer but leave him on top. Paste one of the spider web and drag it to the bottom of the layer palette behind all other layers. I then added the cat and resized it slightly and gave it the same drop shadow as the very first I gave the house.

Now with Your crop tool crop around the image and once done go to layers merge visible. Move this merged layer down in the canvas a bit and then find a paper You like and paste it as a new layer and drag it below the merged layer. Image add borders 3 and choose a color from Your image. Keep it floating and go to effects texture effects weave gap width and opacity 5 weave color black and gap color choose from Your image and fill gaps checked.

All that is left is the text You plan to add and then save as a png. I just used a standard font that comes with vista and gave it a drop shadow to stand out and I saved it as a png.


Thursday, September 10, 2009

Trick or Treat


You will need the following supplies to complete this tutorial.
Scrapkit made by Missy it's called Trick or Treat. I You can't get this kit just another Halloween themed kit.
Template by Butter. Look under Her templates.
Tubes of choice. I used the work of Elias and You can find His tubes at MPT. You will need a license to use any of His work.
Font of choice.
Xero radiance optional.
Eye Candy 4000 optional.

Open the tubes and template in psp and minimize Your tubes. On the template Shift+D to duplicate the template and close out the original. Delete the copyright and background layers. We won't be needing them anymore. Choose the shape layer and with Your magic wand click on the canvas.

Find a paper from the kit Your using that matches Your tubes and open it in psp go to edit copy edit copy paste as new layer on Your canvas. Selections invert and hit the delete key on Your keyboard. Selections select none and delete the original layer. Effects 3d Effects drop shadow with the following settings vertical and horizontal 2 opacity 55 blur 8.00 color black. Repeat with the vertical and horizontal -2.

On the dotted lines layer go to selections select all selections float selections defloat. Layers new raster layer and flood fill this layer with a color that compliments Your tube and tag. Give this layer the same drop shadow only change the blur to 5.00. Delete the original layer.

Ok this next step is kind of tricky so pay attention to what I say. On the rectangle layer use Your magic wand and holding down Your shift key click inside all of the squares. Selections modify expand by 2 and find a paper from the kit You like and paste it as a new layer doing as We did above. Here is the tricky part. Do NOT delete the original layer. Selections select none. Now on the rectangle layer do the shift thing again. We are now going to add our borders. Selections modify expand by 5 click ok and then go to selections modify select selection borders both sides and anti alias checked border width 2. Now add a new layer and flood fill it with a darker color. Drag this layer above Your rectangles filled layer. Selections select none. Give this layer a drop shadow of choice. Don't delete the original layer yet.

Back on the original layer go and do the magic wand again expande by 6 and paste Your tube as a new layer and position as You like it. I just used one tube in a laying down position so it would stretch over the squares. Selections invert delete and selections select none. Now here is the optional part. I duplicated My tube went to adjust blur gaussian blur 5.00. Effects xero radiance and used the default settings. Then so that the blur didnt' show outside of My frame layer I clicked on that original layer again with the steps as above went to selections invert and on the tube layers and then I hit delete and it removed the dark edges. Give one of the tubes a drop shadow of choice. I also lowered the opacity on the top layer to 85 percent.

Choose the bottom line layer and use Your magic wand on the canvas to select it and then do the same for the top line layer using Your shift key and holding it down as You click. Add a new layer and flood fill it with a darker color and go to effects texture effects weave gap size width and opacity on 1 weave color black and for the gap color I used a color from My paper. Add a drop shadow of choice and delete the original layer.

I gave My bats layer a gradient glow with Eye candy 4000 but that's optional and then I gave them a drop shadow.On the thin lines border use Your magic wand and while holding down the shift key add a new layer and flood fill it and then go to effects texture effects blinds and give it a light setting. Give it a drop shadow and then delete the original layer.

Now just add all Your elements, name, and copyright and Your done..Save as png.


Wednesday, September 9, 2009

Luvin Music


For this tutorial You will the need the following supplies.
Scrapkit by Tiny called Luvin Music. If You can't get this kit follow along with another. Any kit will work for this tutorial as with any of My other's.
Rock chick template by ButterflyFlutterby. Look under templates and You will see it.
Tubes of choice.
Font of choice.

Open the tubes and template in psp minimize the tubes and on the template Shift+D to duplicate it and then delete the original. Image canvas size 700x700 and delete the copyright and background layers on the template. We won't be needing these. Open a paper from the kit and go to edit copy and on the Splatter layer go to selections select all selections float selections defloat and the paste the paper as a new layer. Selections invert and hit the delete key on Your keyboard. Selections select none.

Delete the original layer and on the Splatter layer You made go to adjust add remove noise add noise gaussian and Monochrome checked noise 40%. You can always use Your own settings. Effects 3D effects drop shadow vertical and horizontal 2 opacity 50 blur 3.00 color black.

Choose the back bar layer in the layer palette and with the magic wand click on the canvas and find another paper that compliments Your color scheme and copy it and paste it as a new layer to Your template and do as You did above. As You already have a shadow with the back bar don't give it a drop shadow unless You want to add a bit more definition of the layer. Delete the original layer.

Top fill frame use Your magic wand and get those ants marching and then hold down the shift while You click the other frame fill be sure to make that layer highlighted in the palette or Your ants will march all around the tag instead of where We want them. I had a small play with blending a few papers on top of one another and playing with the blend modes and opacity. You do this all in the way You did everything else. Use Your imagination and do something different after all this is Your tag not Mine and it does not need to be a carbon copy. When Your done go to selections select none and delete the original layers.

Repeat the same steps on both the top frame layer and bottom frame layer. With Your eye dropper tool click a light color from a color on Your tag and look in Your materials palette and take note of the H and S numbers go to adjust hue and saturation colorize and colorize the staples that are above Your frame layer. Delete the word art layer.

Choose the large note layer and with Your magic wand click the note in the template. Choose two colors from the tag or paper and go to Your materials palette and click on the gradient tab. Make a gradient with Your foreground and background colors. Layers new raster layer and flood fill this with that gradient. Selections select none and give it that noise effect but use the settings You like best.

Colorize Your top staple layer as You did with the previous one. I'm sorry I overlooked it. Choose a frame from Your kit. Preferrably one that is very small or an element large enough to put a background into along with Your tube. Paste it onto Your canvas. You might have to resize it and if You do go to image resize by 10 percent or whatever is needed all layers unchecked. With the magic wand click inside the element or frame and find a paper or color You like and paste it as a new layer or flood fill on a new layer selections invert and hit the delete key on Your keyboard. Selections select none. Open the tube Your using and paste it as a new layer. Again use Your magic wand on the element and place the tube exactly as You'd like it then selections invert and hit the delete key so that the excess tube is trimmed.

Duplicate the tube layer and on the bottom one go to adjust blur gaussian blur 5.00 and click ok. On the top tube put the blend mode in the layer palette on soft light and go to effects texture effects blinds and give it a very light blinds effect.


Tuesday, September 8, 2009

Fall Harvest


You will need the following supplies to complete this tutorial.
Scrapkit by Kelly. I am using Autumn Harvest. If You are not able to get this kit any fall themed kit or a kit with a frame will do. Just use My tutorial as a guide.
Thank You Kelly for allowing Me to use Your kit for My tutorial -hugs-.
Tube of choice. I am using a tube by Barbara Jensen. You need a license in order to use any of Her work.
Font of choice or Mine.

Open up the frame into psp. Hold down shift while pressing the letter D to duplicate Your frame and then close out the original. With Your eye dropper tool find two colors from either the tube or kit that You like. The foreground dark background light. Click on the background color of Your materials palette and go to the gradient tab and use the following settings or Your own angle 124 repeats 3 invert checked style radial. With Your magic wand click inside the frame and when the ants begin to march go to selections modify expand by 10 and click ok. Layers new raster layer and flood fill this layer with Your gradient color. Adjust blur gaussian blur 5.00 click ok. Duplicate this layer and go to effects texture effects weave and use the following settings gap size width and opacity on 1 weave color black gap color I used an orange color but You could use Your lighter background color for it and fill gaps checked. In Your layer palette put the blend mode onto Luminance (L). You can experiment with Your blend modes to see what You like more.

Click on the frame layer again in Your layer palette and give it a drop show with the following settings vertical and horizontal 2 opacity 65 blur 10.00 repeat this step with the vertical and horizontal on 0. Ok now what I did since My fairy tube was pretty small for the frame itself I clicked back inside My frame layer once again added a new raster layer and pasted into selection I put the blend mode on Luminance (L) and lowered the opacity to about 30 and then I repasted My main tube as a new layer placed her where I wanted her and gave it the drop shadow we just used on the frame with the 0 settings. If You need more room go to image canvas size 700x700.

Now add the elements You want to use and give them the same drop shadow We have been using placing the elements as You like. Now open the font I supplied You with and type out Your text I had to use size 500 but then I'm using windows vista so it might be different than on other systems. I turned off the background and typed in the name Storm and then added the same drop shadow I'd been using and placed it where I thought it looked nice. Crop or resize if You need to and then add the copyright layer save as png and then Your done.


Monday, September 7, 2009

Happy Thanksgiving


You will need the following supplies to complete this tutorial.
Scrapkit by Debbie and You can get Her kit here.
This is Her newest kit and She has many many other's so please take a gander at all She and the store has to offer and I know they are offering some freebies for a limited time.
If You can't get this kit any Thankgiving or Fall themed kit will work just google free scrapkits and I'm sure on My blinkies and links You could find one or two.
Template by Butter from ButterflyFlutterby Creations.
Tube of choice. I am using tubes from the kit by Debbie.
Font of choice.
Thank You ladies for allowing Me to use Your kit and template in My tutorials -hugs-.
Please leave some love when You download.

Ok open the template and tube in psp and minimize the tube. Hold Your shift key while at the same time pressing D on Your keyboard to duplicate the template. Close out the original. Delete the copyright and background layers We won't be needing them. Image canvas size 700x700. You can always crop or resize later if You need to.

In Your layer palette for the group layer go to selections select all selections float selections defloat. Find a paper in the kit You like and open it in psp and go to edit copy edit paste as a new layer selections invert and hit the delete key on your keyboard to trim off the excess paper. Selections select none and delete the original layer. On the doodle layer go to selections select all selections float selections defloat layers new raster layer and flood with a color that is either slighter darker or lighter than the paper You chose for the group layer. Delete the original layer and on the one You just filled give it a light blinds effect by going to effects texture effects blinds with the following settings width 2 opacity 10 color black the other two boxes marked and click ok. Effects 3D effects drop shadow vertical and horizontal 0 opacity 40 blur 2.00 color black.

Do raster 3 the same way filling it with a slightly darker color to compliment the one's You've used so far and give it that same drop shadow not forgetting to delete that original layer. On the back rectangle layer find another complimentary color for it and go to Your magic wand and click on that layer in the canvas and go to layers new raster layer and flood fill it with the color You chose. Effects texture effects weave the gap width and opacity all on 1 weave color black gap color black and the box checked now click ok. Delete that original layer and go to effects 3D effects drop shadow and use the following settings or one's of Your own horizontal and vertical on 2 opacity 50 blur 10.00 color black and repeat this with the vertical and opacity set on 0.

Choose the Inner BackRectangle layer and use Your magic wand using it on the canvas go to layers new raster layer and fill it with a complimentary color. I just used the colors that were set inside my swirls background from the paper as most papers are textured therefore it gives You other colors to play with to match. Selections select none and give it the same blinds effect You did on the swirls.

Now choose the dotted line fill layer and with Your magic wand click on the canvas layers new raster lay and fill it with a complimentary darker color. Delete the original layer and back on the one You just filled give it the same blind effect You did the others. Go to the outter dotted line layer selections select all selections float selections defloat add a new raster layer and flood fill this with another complimentary color. Delete the original layer and give it a drop shadow with the following settings horizontal and vertical on 1 opacity 40 blur 2.00 color black. Do these same steps for the inner dotted line layer.

On the circle background layer use Your magic wand and click the circle in the canvas and when the ants are marching go to selections modify expand by 2 and with that same paper as You used on the swirls edit copy edit paste as a new layer. Selections invert and hit the delete key on Your keyboard. Selections select none and delete the original layer. On the black I'm stuffed text layer give it the same drop shadow We just used. Leave the white circle frame shadow as is and click the layer above that one and using Your magic wand click on the canvas to get those ants marching and go to layers new raster layer and flood fill it with another complimentary color. Selections select none and then give it that same texture weave we did before on the other frames layer. Give this layer a drop shadow of vertical and horizontal 1 opacity 40 blur 10.00.

Now on the eyelet and tag eyelet layers go to adjust hue and saturation colorize and adjust it to match the colors of Your layers. On the tag layer use Your magic wand and go to layers new raster layer and flood fill the layer with one of the lighter colors You have used. Selections select none and give it the same blinds effect that's been used. On the black tag Happy Thanksgiving drag that layer under the white one just below it. Effects 3D effects drop shadow vertical and horizontal 1 opacity 40 blur 2.00 color black. On the tag screen color go to selections select all selections float selection defloat and layers new raster layer flood fill it with a similar color to Your tag color and delete the original layer leaving the shadow layer Butter already has in place. Now on that same string layer You just filled go to that same blinds we did before but change the options where there is no check on light from left/top all other settings remain the same. Then delete the black outer text layer.

Another option You have on all the text layers is You could colorize them or fill them but I left them as they were. Now all that is left is adding Your tube and the kits elements. Now if Your adding the elements of the kit I'm using Your going to have really resize them down. As in the girl I had to go to image resize by 15 or 20 percent and so on with the other elements. After adding all the elements You want add Your name and voila Your finally done.


Sunday, September 6, 2009

Leaves Of Fall


You will need to get the following supplies for this tutorial.
Scrapkit by Rieneke which You can purchase from here. She also has a wonderful tutorial site and You can find that here.
If You can't get this kit then use another and follow My tutorial as an example. Any kit will do as always with My tutorials.
Thank You Rieneke hon for allowing Me to use Your kit for My tutorial -hugs and kisses-.
Template by ButterflyFlutterby.
Thank You Butter for sharing Your templates -hugs-.
If You download please show her some love.
Two close up tubes of choice. I am using the artwork of Keith Garvey. You can find His tubes and licensing information here.
Font of choice.

Open up the tubes and template in psp. Minimize the tubes and on the template hold down the shift key+D at the same time to duplicate it and close the original. Delete the copyright and background layer We won't be needing them. In Your layer palette choose the mask layer and go to selections select all selections float selections defloat. From the kit find a paper You like and open it in psp. Edit copy Edit paste as a new layer. Selections invert and hit the delete key on Your keyboard. Selections select none. Delete the original layer and add a drop shadow of choice. Effects 3D effects drop shadow. I chose vertical and horizontal 0 opacity 40 blur 10.00 color black.

Next choose the fat lines layer and do as You did above. I did change My drop shadow to the following settings though vertical and horizontal 2 opacity 50 blur 10.00 color black. I then repeated changing only the vertical and horizontal to 0. Do the same steps for the thin lines also. You could always use a color fill too if You don't want to use a paper. Either method would work for this tag.

In Your layer palette choose the label 1 shadow and with Your magic wand click this layer with wand on the canvas. Layers new raster layer and fill it with a complimentary color from Your papers or tube. Keep the ants marching and then click on the label 1 layer and add a new raster and flood fill it with another complimentary color. Add the same drop shadow We have been using and delete the original layers. For those other layers above in the layer palette do the same steps as We just did.

In Your layer palette go back down to the Top Backplate layer use Your magic wand on the canvas and add a new raster layer. Fill it with a complimentary color. Slections select none. On the layer above it called Top Fill use Your magic wand again and add a new layer or paper of choice and do it as We did the other paper parts. Just remember to keep deleting all the original layers and add the drop shadows. Now do the same with the other frame layers as You did the other one. You can either colorize the screws or leave them as they are and add a slight drop shadow. Just use a color from Your plate maybe a little light and go to adjust hue and saturation colorize and fiddle around with the settings some.

Now on the frames background go to selections select all selections float selections defloat and resize Your tubes as needed by going to image resize by 45 percent all layers unchecked as an example and place it in the frame. Selections invert and then hit the delete key to trim to excess from the tube. Add a drop shadow to each tube that You use. I did lower My opacity on the backgrounds of the frames as it was awful dark and I wanted to fade it a little bit. This is optional of course.

Now all You need to do is add elements from the kit. Resizing as needed and adding drop shadows as You go. Then on Your nametag add the name or text You wish to use and add a drop shadow. Add Your copyright if there is one and crop or resize if needed and save as png and Your done.

Saturday, September 5, 2009

Pimp My Tags w/Scraps

The ladies over at Pimp My Tags w/Scraps have some new kits available for You.
And they are all at affordable prices and even offer freebies on They're blog. You can
find all of they're kits and things here. Thank You ladies for sharing Your talent and
allowing Me to help You out.
XOXOXOX
Jynxi